Small apartments often feel fine in person because your brain filters clutter, corrects perspective, and quietly ignores awkward corners. A camera is far less kind. It freezes every harsh edge into a flat rectangle that can make a livable room look tiny.
On video, that rectangle can read like a shoebox or like a compact but breathable home. For technically minded shooters, a 360 Grad Kamera opens a different set of tricks. The goal is simple: capture tiny spaces so they collapse less on screen.
Why Cameras Punish Small Rooms
A camera sees only a fixed field of view at any moment. Go narrow and you crop away context, so the viewer loses escape routes for the eye. Go ultra wide and straight lines bow, making walls lean inward and ceilings feel lower.
Human vision stitches thousands of micro glances into one fluid model of the room. The sensor samples far fewer perspectives. Without deliberate planning, the viewer reads the recording as one cramped snapshot rather than an ongoing experience of a workable apartment.
That mismatch explains why early tests often look disappointing, especially once you reframe 360 Grad Kamera footage into a flat view. The camera is not cruel; it simply reveals choices you made unconsciously while standing there.
Translating Floor Plans Into Sensor Positions
Treat the apartment like a grid instead of a vague vibe. Sketch doors, windows, and big furniture as rectangles, leaving realistic pockets where a tripod or rig could sit.
Pick three or four camera nodes on that sketch. From each node, aim down the longest diagonal you can find rather than staring straight at a single wall.
A fast scouting loop
- Stand at each node and pan slowly. Flag angles where vertical lines bow or where window highlights blow out nearby texture.
- Walk your planned tour path with the rig. Note chokepoints, mirrors, and spots where a 360 Grad Kamera might suddenly reveal the tripod or your elbow.
Where a 360 Grad Kamera Should Stand
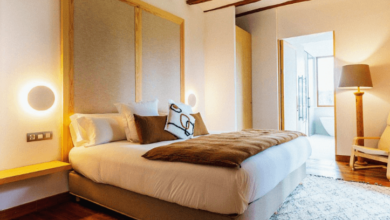
A 360 Grad Kamera sees everything around it, but that does not mean every location is equally useful. Dead center in a small room often reveals symmetry while also advertising how short the walls really are.
Slightly offset positions usually produce friendlier geometry. Place the 360 Grad Kamera near a corner at roughly eye height, high enough that chair backs and lamp shades do not slice the frame into distracting bands.
Once you find a promising node, lock it in. Mark the tripod footprint, save a diagram, or photograph the floor. Returning the 360 Grad Kamera to that same spot across videos keeps the layout stable in the viewer’s memory.
See also: Understanding the Home Buying Process: From Offer to Closing
Virtual Focal Lengths Inside 360 Footage
Once capture is done, framing becomes software. When you reframe 360 Grad Kamera footage, you are effectively choosing virtual focal lengths. Moderate views that mimic thirty five millimeter lenses usually feel honest, preserving scale without stretching geometry.
Reserve very wide reframes for moments when the full layout matters, like showing distance from kitchenette to sofabed. Even then, pivot only around your best node. Sudden jumps between aggressive 360 Grad Kamera views make tight rooms feel jittery and game-like.
One useful rule of thumb: if a reframed pan from your 360 Grad Kamera makes furniture feel like it is stretching, you are probably too wide. Back off slightly and let the room breathe instead of flexing.
Lighting Small Rooms for Perceived Depth
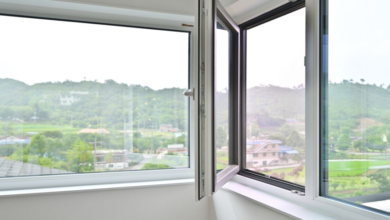
Light decides whether surfaces separate or merge. Treat windows like huge soft boxes and avoid frames where the sensor looks straight into bare glass. In 360 Grad Kamera captures, one burned highlight band can wrap around half the room.
Use several small light sources instead of one harsh ceiling fixture. A lamp near the back wall, a subtle strip under shelves, and a low source behind the node create depth layers that read clearly when you later sweep through 360 Grad Kamera footage.
Color temperature matters too. When the 360 Grad Kamera sees cold daylight and warm tungsten in the same direction, the room fragments. Matching bulbs or simple gels keeps the space feeling like one continuous volume.
Movement Patterns That Keep Viewers Comfortable
In cramped rooms, motion should be boring in the best way. Short, slow moves between nodes beat arcs. A 360 Grad Kamera records peripheral context, so movement needs to steer attention gently.
Keep the rig close to your center of mass when walking. Move along straight segments between nodes and let stabilization smooth things. A reframed 360 Grad Kamera path should feel like calm gliding.
Pre-tour movement checklist
- Walk the route while watching a live feed. Fix spots where the 360 Grad Kamera clips door frames or drifts close to hanging lights.
- Do one ultra slow lap at your main node. Confirm that any reframed 360 Grad Kamera spin keeps horizons level and avoids sudden, stomach-turning acceleration.
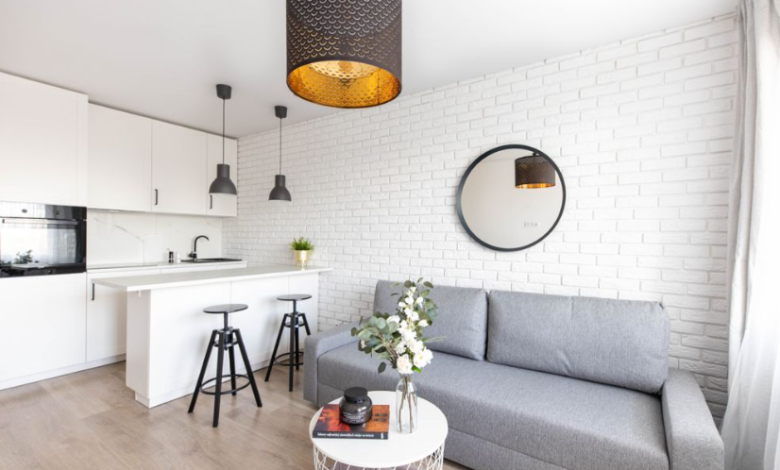
Styling Signals That Reduce Visual Noise
You do not need a full makeover to help a studio read larger. Clear eye level shelves, the top of the fridge, and the center of the coffee table. With less random detail, a 360 Grad Kamera sees calm planes rather than chaotic edges.
Use repetition to link distant corners. Matching cushions, recurring wood tones, or a pair of identical lamps tie zones into one perceived volume. As you move through 360 Grad Kamera passes, those echoes quietly convince the brain that the room stretches further.
Vertical storage helps only when it stays visually quiet. If a 360 Grad Kamera sweep reveals many mismatched objects on shelves, hide most behind doors and keep just a few consistent shapes.
Running Quick Technical Checks After Each Shoot
Geeks like reproducible experiments, and tiny apartments reward that mindset. Treat each shoot as a test run. Log exposure, white balance, and stabilization settings for every node. If the 360 Grad Kamera allows manual control, lock values instead of chasing auto corrections.
After your first pass, watch the footage once without editing. Pause whenever the room suddenly feels smaller. Decide whether framing, light, or movement caused it, tweak one variable, then rerun. Gradually you converge on a stable 360 Grad Kamera configuration that reliably looks generous.
Once you trust the numbers, each change becomes a controlled experiment. That mindset keeps 360 Grad Kamera sessions interesting instead of frustrating, because you always know which dial probably caused an improvement.
Turning Your Shots Into a Repeatable Blueprint
The long term win is a blueprint, not one perfect upload. Document nodes, preferred virtual focal ranges, and typical movement paths in a simple diagram. Mark where each 360 Grad Kamera clip starts and ends, as if you were drawing edges on a small graph.
When you rearrange furniture or add equipment, rerun the scouting loop instead of guessing. Update the diagram, keep shooting from familiar nodes, and compare results. Over time, viewers stop thinking about square meters and recognise a well tuned setup captured by a quiet 360 Grad Kamera in the corner.
The same blueprint helps when something feels wrong. If a fresh 360 Grad Kamera pass suddenly feels claustrophobic, the notes show which node or framing changed.